What is BIMI and How to Set it Up
Secure better email deliverability with BIMI (Brand Indicators for Message Identification). Get insights on why you need BIMI, as well as step-by-step instructions on how to implement it today!
The email marketing landscape is fast-changing. As email sending volumes continue to grow, marketers are expected to face more email deliverability challenges. Companies are always searching for new ways to get their message opened, improve visibility, and increase trust.
In response, email services are going the extra mile to improve deliverability, enhance user experience, and add an extra layer of security. This is where BIMI comes in! BIMI is an emerging email standard that offers an improved user experience and an extra layer of security.
A study done by Red Sift revealed that BIMI resulted in a 90% boost in consumer confidence in sender legitimacy. This new email standard is probably the next big thing in the world of email marketing.
What is BIMI?
BIMI stands for Brand Indicators for Message Identification. It’s an email standard that enables the display of a brand’s official logo next to their message in email inboxes. This innovative email specification offers authenticated senders the ability to represent their brands effectively in messaging services.
What are the benefits of BIMI?
BIMI is highly beneficial. It enables email marketers to build a strong brand image by placing their logos next to email messages. This one-of-a-kind approach creates a visual connection and brand recognition that’s instrumental to improving deliverability and conversion.
This added visibility also helps protect users from fraudulent emails, such as phishing or spoofing attempts. In a nutshell, BIMI is the email standard of choice if you’re looking to reinforce brand credibility and improve deliverability.
.png)
How Does BIMI Work?
To implement BIMI, you’ve to create and publish a new DNS (Domain Name System) record that contains your BIMI TXT record. When a BIMI-supporting email service provider receives an email, it evaluates it using some validation protocols. After authentication, the provider will do a DNS lookup in search of a BIMI record.
Your BIMI record consists of the link to your logo and other technical information. The email service provider will display your brand’s logo if the BIMI record is valid. BIMI works based on some authentication protocols, including:
- Sender Policy Framework (SPF)
- DomainKeys Identified Mail (DKIM)
- Domain-based Message Authentication, Reporting, and Conformance (DMARC)
You may require a Verified Mark Certificate (VMC) to be BIMI-compliant. The VMC is what validates that the logo’s trademark is truly owned by your company. Even though this requirement is optional (although some mailbox providers may require it), VMC could improve deliverability.
Why Do You Need BIMI?
Having covered what BIMI is and how it works, let’s take a quick look at why you need it. Here’re the major benefits of setting up BIMI:
1. Security
To implement BIMI, you are required to adopt protocols like SPF, DKIM, and DMARC. These are protocols built to boost security and deliverability. With your brand’s logo being displayed alongside your messages, impostors will find it extremely difficult to deceive your subscribers.
2. Make Your Message Stand Out
Having your logo displayed alongside your message improves brand recognition. And that’s what you need to stand out from the crowd. In a fiercely competitive business landscape, doing things differently is the way to go if you want to stay ahead of the curve.
3. Earn Subscriber Trust
Given the impact of spoofing and phishing attacks on the cybersecurity landscape, subscriber trust is low. This affects how users respond to brand messages. With BIMI, you can offer your subscribers amazing experiences and confidence in your email campaigns.
4. Increase Deliverability Rates
Implementing BIMI sends a positive signal to email service providers that your emails are authentic and trustworthy. As a result, you’ve got a higher chance of boosting deliverability.
5. Boost Open Rates
It helps you to build trust that translates to higher open rates over time. Having your logo displayed next to your messages offers your brand the recognition it needs to win subscribers' attention. A study done during the BIMI beta program for Yahoo! Mail recorded an average of 10% boost in open rates.
How to Set Up BIMI?
Next, you’ll learn the step-by-step process involved in setting up BIMI. It works only with compliant mailbox providers. BIMI-supporting email services include AOL, Google, and Yahoo! That said, here’s how to set up BIMI:
Step 1: DMARC Compliance
The first step in BIMI setup is to ensure full DMARC compliance, which verifies that SPF and/or DKIM for all mail are properly aligned and authenticated with your From-domain.
BIMI Needs DMARC to Work
Ensure DMARC compliance by setting a reject policy in your DMARC record — either p=quarantine or p=reject.
Step 2: Create Your BIMI Logo Image
Create a brand logo that meets BIMI’s official specifications. Here are the basic requirements:
- Square dimensions
- SVG file size no more than 32KB
- Non-transparent background
- Solid background color is recommended
Next, format your logo to be BIMI-compliant. The image must be in SVG Tiny P/S format.
There are conversion tools available, but they can be difficult to use.
After reviewing this article on the full specifications, we found the simplest way to create a compliant file is as follows:
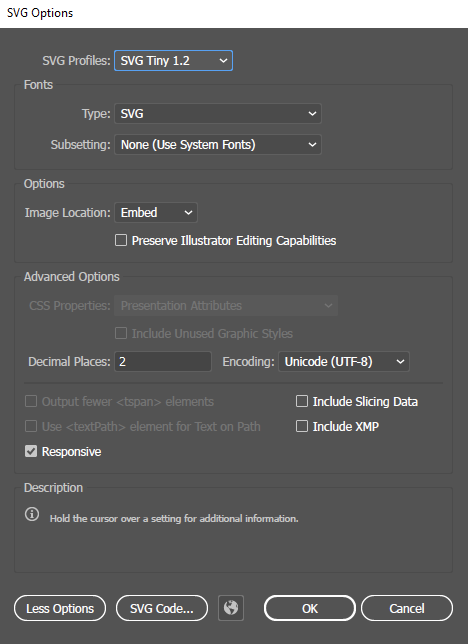
Step 2.1: Use Adobe Illustrator to “Save As…” an SVG
Select the “SVG Tiny 1.2” profile when exporting your file.
Step 2.2: Open the SVG File in a Text Editor and Make the Following Changes
- Edit the profile name
- Remove the
xandypositioning attributes
- Remove the
overflowattribute (if present)
- Convert any CSS styling into XML attributes
| SVG Before Edits | SVG After Edits |
|---|---|
|
|
|
|
Step 3: Get a Verified Mark Certificate (VMC)
Not every provider currently requires a VMC for BIMI to function, but this may change over time.
To obtain a VMC, your logo must be trademarked with the relevant authority.
After verifying trademark ownership, you can purchase a VMC from a certified authority such as:
- Entrust
- DigiCert
Step 4: Publish a BIMI Record in DNS
After creating a BIMI-compliant logo, go to your domain’s DNS records to publish a BIMI record. Insert a new TXT record in the default._bimi subdomain. This includes the BIMI version and where your logo is located (make sure the URL is HTTPS). Save the new record and you’re good to go!
default._bimi.[domain] IN TXT “v=BIMI1; l=[SVG URL]; a=[PEM URL];"
If this is too technical for you, you can quickly and effectively set things up using this BIMI generator and click "Generate BIMI" to help you produce a valid record.
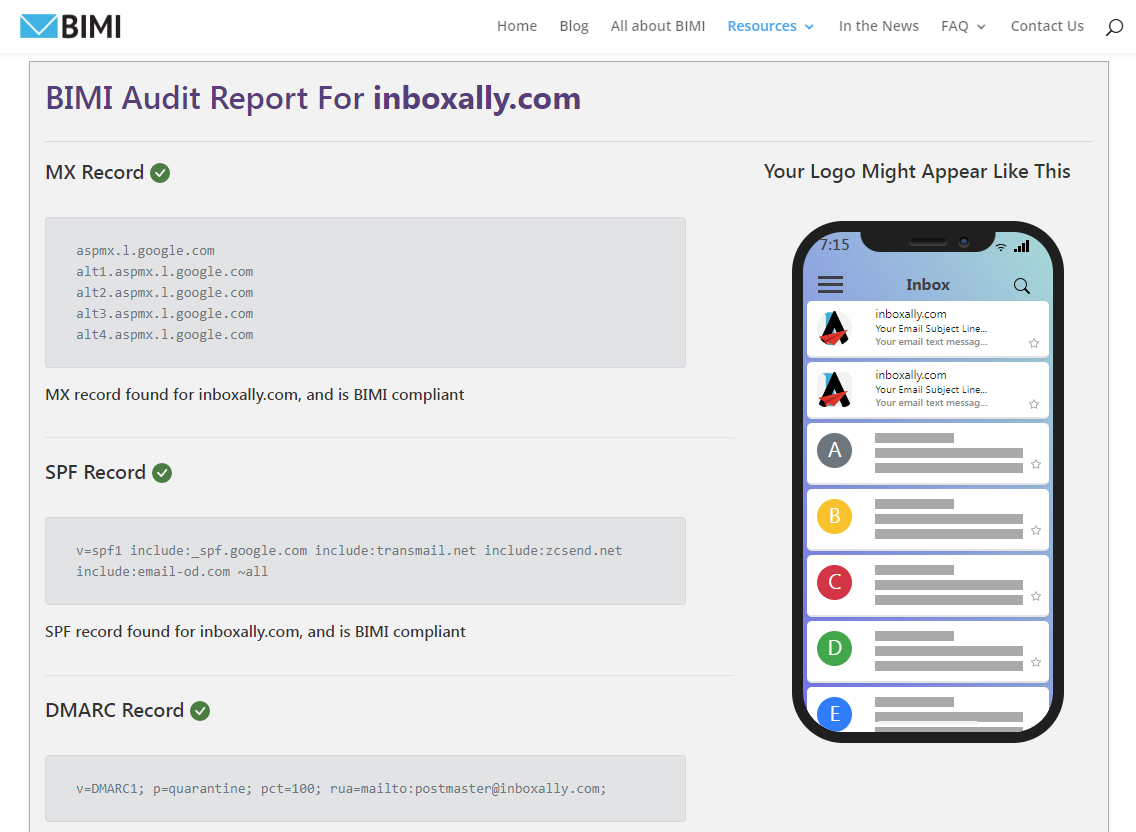
As an example the BIMI record for inboxally is as follows:
v=BIMI1; l=https://assets.inboxally.com/images/ia-logo-bimi.svg; a=;
Step 5: Check to Ensure Your BIMI is Properly Set Up
As soon as your record is published, double check the SVG image, DMARC, and other requirements using the BIMI Inspector to look up your domain and check if BIMI is set up properly. You will see alert icons about all potential issues. After setting things up, you’ll need to give it about 24 hours to propagate and see the logo appear in the inboxes.

What to expect with BIMI
BIMI enables you to stay ahead of the curve by enhancing your brand recognition & reputation, offering more security, and enabling a better subscriber experience. It’s harder to stand out in the inbox than ever before so we recommend investing the effort to gain that extra credibility.
What Inbox Providers Support BIMI?
-
Gmail (Google) – Displays BIMI logos; typically requires a Verified Mark Certificate (VMC) or Common Mark Certificate (CMC).
-
Yahoo Mail (Verizon Media) – Supports BIMI logo display and often allows self-asserted records (no VMC needed).
-
Apple Mail (iOS 16+, iPadOS 16+, macOS Ventura+, iCloud.com) – Fully supports BIMI with VMC requirement.
-
Fastmail – Allows BIMI logo display, even with self-asserted records (no VMC required).
-
AOL Mail – Supports BIMI with proper authentication setup.
-
La Poste (France) – Supports BIMI; domains without VMC may require manual verification.
-
Zone – Fully supports BIMI logo display.
-
Cloudmark (Proofpoint) – Supports BIMI.
-
GMX – Supports BIMI.
-
Zoho Mail – Supports BIMI.
-
Zoner – Supports BIMI.
Frequently Asked Questions About BIMI
What is BIMI used for?
BIMI (Brand Indicators for Message Identification) displays a brand’s verified logo next to emails in the inbox. It enhances brand recognition, builds subscriber trust, and signals legitimacy to inbox providers. As adoption grows globally, BIMI is becoming essential to modern email marketing.
Is BIMI a form of email authentication?
No. BIMI is not an authentication protocol. It works alongside SPF, DKIM, and DMARC. These authenticate the sender’s identity, and BIMI uses that verification to display the brand’s logo once the domain passes those checks.
Do you have to pay for BIMI?
BIMI itself is free to implement. However, some inbox providers (like Gmail and Apple Mail) require a Verified Mark Certificate (VMC) to show your logo. A VMC, issued by a trusted authority, usually costs a few hundred to a few thousand dollars per year.
What are VMCs?
A Verified Mark Certificate (VMC) is a digital certificate from an approved authority (such as Entrust or DigiCert) verifying that your logo is trademarked and officially owned by your company. Some providers require a VMC for BIMI logos to appear, adding trust and brand protection.
